If you’ve ever spent hours troubleshooting a leaky pipe, a malfunctioning car engine, or a faulty industrial pump only to find the problem came down to a misinstalled gasket, you know how frustrating even a small sealing component can be. As a gasket supplier with over two decades working directly with maintenance teams, industrial engineers, and even weekend mechanics, I’ve seen more projects derailed by improper gasket installation than by any other single factor. A gasket is only as good as how it’s put in—cutting corners on technique can turn a high-grade, precision-molded component into a useless piece of rubber or composite. Today, I’m breaking down the exact, step-by-step process to install a gasket correctly, no matter what application you’re working on. Gaskets
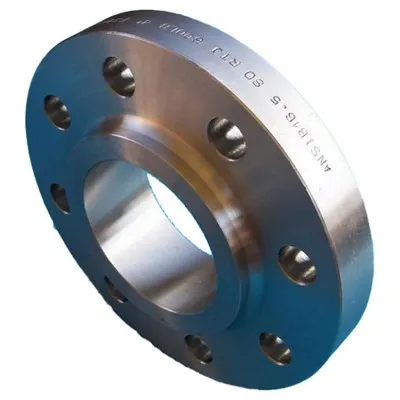
First, let’s start with the most critical pre-installation step that most people skip entirely: verifying you have the right gasket for the job. This isn’t just grabbing the part number that’s listed in your old manual and crossing your fingers. Gaskets are not one-size-fits-all, and choosing the wrong material, size, or thickness will doom your installation before you even start. Let’s break that down. Material compatibility is non-negotiable here. A gasket meant for freshwater pipes will break down in contact with petroleum-based oils, acids, or high-temperature steam. For example, natural rubber gaskets work fine for cold-water plumbing but will quickly degrade in hydraulic systems that use mineral oil. Nitrile (Buna-N) gaskets handle oil and fuel well but fall apart when exposed to ethylene glycol or high heat over 250°F. For industrial applications like steam valves or chemical processing equipment, you’ll need specialty materials like PTFE (Teflon), graphite, or EPDM, each rated for specific pressure and temperature ranges. Next, confirm the exact dimensions: your gasket needs to match the inner and outer diameter of the flange, the bolt hole spacing, and the thickness of the flange faces. Too thin, and it won’t fill the gap between mating surfaces, leaving space for leaks. Too thick, and you’ll over-tighten the bolts, warping the flange or crushing the gasket beyond its elastic limit. If you’re replacing a gasket, don’t rely on the old, worn part to get your dimensions—measure the flange directly, or check the equipment’s original specifications from the manufacturer. As a supplier, we get calls every week from customers who installed a gasket that fit the old part only to find it’s 1/32 of an inch too small, leading to a slow leak that costs them hundreds of dollars in downtime.
Once you have the correct gasket, the next step is preparing the mating surfaces. This is another area where mistakes happen, and it’s far more impactful than any trick you use during installation. Even if you have a perfect gasket, a tiny scratch, a leftover piece of old gasket, oil, or rust on the flanges will prevent the seal from being airtight or watertight. Start by fully removing all remnants of the old gasket. Use a plastic or brass scraper—never a metal one, which can leave deep scratches on soft metal flanges like aluminum or cast iron. For stubborn residue, a gentle solvent (like isopropyl alcohol for most applications or a dedicated gasket remover for heavy buildup) works well, but make sure you wipe every trace of solvent away with a clean, lint-free cloth before moving on. Next, inspect the mating surfaces for flaws. Look for warping, pits, or dents that are deeper than 0.005 inches—these will leave gaps that even a well-installed gasket can’t fill. If you find minor surface irregularities, a fine-grit emery cloth or surface conditioning pad can smooth them out, but avoid over-sanding, which will change the flatness of the flange. If the damage is severe, you’ll need to machine or replace the flange before installing a new gasket. Finally, clean the entire surface thoroughly with a degreaser. Oil, grease, or even hand oils from touching the flange will create a barrier between the gasket and the metal, causing leaks. I always recommend wiping the flange twice: once with solvent, then once more with a dry cloth, to ensure no residue is left behind.
Now, we get to handling the gasket itself. This might seem trivial, but gaskets are delicate, especially thin or specialty ones like PTFE or compressed non-asbestos fiber. Never touch the sealing surface of the gasket with your bare hands—oil and dirt from your skin can transfer to the material, creating weak points and leaks. If you need to pick it up, use gloves or hold it by the outer edge only. Also, don’t bend or fold the gasket, even if you’re in a hurry. Folds can cause permanent cracks that will break the seal. For specialty gaskets that need a little flexibility (like thin spiral-wound gaskets), bend them gently along their circumference, not across their diameter, to avoid damage. If you’re working with a gasket that requires a sealant, use the right kind for your material and application. Many newer gaskets come with a pre-applied adhesive or coating, so double-check the packaging—adding extra sealant here will often cause problems, not fixes. Too much sealant can squeeze out and get into the system, clogging pipes, valves, or filters. If you do need to apply a sealant, use a thin, even coat only on one side of the gasket, and make sure the sealant is compatible with both the gasket material and the fluid or gas that will pass through your system.
The next step is fitting the gasket into place, and this is where alignment is key. Once the mating surfaces are clean and prepped, lay the gasket directly onto one flange. Make sure it sits perfectly flat—don’t try to force it into place, and don’t let it overlap or shift as you bring the two halves together. For flanges with multiple bolt holes, line the gasket up with the bolt holes first, then hold it in place as you bring the opposing flange down. If you’re working on a small assembly, you can use a few loose bolts to hold the gasket in position temporarily—screw them in just a couple of turns, so the flange doesn’t move but the gasket stays aligned. This is far better than trying to hold the gasket with one hand while you fumble with bolts with the other, which often leads to the gasket shifting or becoming crooked. As someone who has watched customers ruin a perfect installation in 10 seconds by shifting the gasket mid-assembly, I can’t stress this enough: take the time to align the gasket properly. Even a 1/8 inch misalignment in a large flange can create a gap that causes a slow leak, or even a blowout when the system is pressurized.
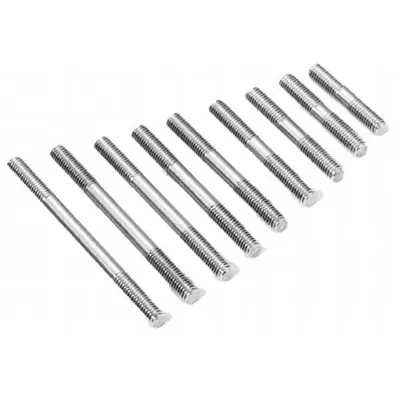
Now, the most important step of all: tightening the bolts. This is where 90% of gasket installations go wrong, because people rely on torque alone instead of following a proper crisscross pattern. The goal here is to apply even, consistent pressure across the entire gasket surface to compress it evenly and create a uniform seal. If you tighten bolts in a circle, you’ll put too much pressure on one side of the gasket and too little on the other, leading to leaks, crushed gasket material, or warped flanges. Here’s the correct way to do it. First, thread all bolts by hand, until they are just snug—don’t start tightening with a wrench yet, as this will also misalign the flange. Next, use a crisscross pattern, like the spokes of a wheel, starting with the bolt opposite the top of the flange. Tighten each bolt to about 25% of your required final torque, moving to the next opposite bolt each time. Once all bolts are at 25% torque, go back and do a second pass at 50% torque, following the same crisscross pattern. Then, do a third pass at 75% torque, and a final fourth pass at the full, manufacturer-specified torque. Why do multiple passes? This gradual, even compression prevents the gasket from shifting, and ensures that every part of the sealing surface gets the same amount of pressure. Also, always use a calibrated torque wrench—guessing how tight a bolt is will almost always lead to over-tightening, which crushes the gasket so much it can’t expand to handle pressure, or under-tightening, which leaves gaps. For example, a compressed non-asbestos fiber gasket might require a torque of 20 ft-lbs per bolt, while a spiral-wound gasket for high-pressure steam might need 60 ft-lbs. Check your gasket’s specifications and follow them exactly—never use generic torque values.
Once all bolts are tightened to the correct torque, do a final check. Go through each bolt one more time, in the same crisscross pattern, to make sure none have loosened during the final tightening pass. Then, if your system allows, pressurize it gently (do this slowly, especially for high-pressure systems) and check for leaks. If you see a small leak, don’t go and crank the bolt tighter—this will almost always make the problem worse. Instead, loosen all bolts evenly, check for any misalignment or debris, and re-tighten following the same torque pattern. If the leak persists, the gasket might have been damaged during installation, or you might have chosen the wrong material or size.
Now, let’s cover some common mistakes that even experienced people make, to help you avoid them. First, never reuse gaskets. Even if a gasket looks fine, it has already been compressed once, so it can’t provide the same uniform seal as a new one. Reusing gaskets is a false economy that leads to more leaks and more downtime. Second, don’t use excess sealant. As I mentioned earlier, too much sealant will squeeze out and contaminate your system. If in doubt, use a gasket with a pre-applied sealant, which is designed to work with the gasket material and avoids the mess of applying your own. Third, don’t ignore flange flatness. Even with a perfect gasket, a warped flange will never create a good seal. If you’re working with an older piece of equipment, always check the flange flatness with a straightedge before installing a new gasket.
At the end of the day, proper gasket installation is a mix of attention to detail and following the process step by step. It’s not about rushing through the job or guessing at torque values—it’s about verifying your parts, prepping your surfaces, handling the gasket with care, aligning it perfectly, and tightening bolts evenly and to the correct torque. If you follow these steps, you’ll cut down on leaks, reduce downtime, and get the most out of every gasket you install.
If you’re working on a project and need help choosing the right gasket material, size, or type, or you have questions about installation for a specific application, our team of gasket specialists is here to help. We work with maintenance teams, engineers, and contractors across industries, and we can provide expert guidance tailored to your unique needs. Whether you need a single gasket for a small plumbing repair or bulk orders for a large industrial facility, we can support you. Feel free to reach out to our team to discuss your requirements and find the perfect sealing solution for your project.
Flange References
- Gasket Installation Best Practices. Fluid Sealing Association, 2021.
- Spiral Wound Gasket Design and Installation Guidelines. American Society of Mechanical Engineers (ASME), 2019.
- Compressed Non-Asbestos Fiber (CNAF) Gasket Performance and Installation Specifications. International Organization for Standardization (ISO), 2020.
- Surface Preparation for Gasket Sealing. Pipeline and Hazardous Materials Safety Administration (PHMSA), 2018.
Shanxi Xinshunda Flange Manufacturing Co., Ltd.
As one of the most professional gaskets manufacturers and suppliers in China, we also support customized service with competitive price. We warmly welcome you to wholesale high quality gaskets for sale here from our factory. For quotation, contact us now.
Address: Zhunagli Industrial Zone,jinchang Town,dingxiang,shanxi,china
E-mail: sales01@xinflange.com
WebSite: https://www.xinflange.com/
